The rumors are true: we’ve packed up all of our worldly possessions and are leaving Seattle to move to the fair city of Boston. We both love road trips, so we decided the best way to get there would be the same way we got out here in the first place: driving! Thankfully, we could pay someone to haul all our furniture for us, so all we have in the car is food, camping supplies, and our trusty sidekick, Zoe. Let the adventure begin!
We spent our last day in Seattle with a delicious lunch of Paseo sandwiches (the #1 and #2) and a farewell dinner thrown and attended by some great friends. The party was QUITE a shindig, complete with four different meat preparations (smoked ribs, Hempler’s hot dogs, chicken parm on the grill, and grilled pork saltimbocca) as well as some of our favorite Pacific Northwest beers, wine, and sangria (you guys know us so well!). Although we had every intention of not overindulging, even the best-laid plans…
Monday, July 19, 2010
Friday, July 2, 2010
Profiteroles: More Fun than Patting a Shoe
[Disclaimer: We know... it's been forever since we've posted. We also know that excuses are lame, but we are about to move 3,000 miles to Boston, change jobs, and buy a house, so blogging about food has had to take a bit of a back seat these days.]
Now that the World Cup is upon us, we’ve been forced to remind each other that we should pull ourselves away from the TV for long enough to enjoy a little bit of the Seattle sun as it starts emerging from a long winter of hibernation. And what better way to enjoy summer (while still embracing the international spirit) than by making Profiteroles; light, puffy pastry balls filled with ice cream.
We were inspired, once again, by the Michael Ruhlman book Ratio, which provided us with the basic steps necessary to make the dough known as pate a choux (pronounced “pat a shoe”). Once we’d made the shells (as described below), we tried our hands at another batch of homemade ice cream; this time, a delicious chocolate orange, reminiscent of those Terry’s chocolate oranges (recipe not included here, but maybe we’ll do a dedicated ice cream post later in the summer). Although neither of us are big chocolate ice cream fans, we found that the orangeiness perked the flavor right up, and it proved to be the perfect filling for our profiteroles.
PATE A CHOUX (for use in profiteroles, cream puffs, éclairs, gougeres, or even gnocci).
Ingredients

Our recommendation, therefore, is to wait until you’re ready to serve them, cut off the tops (like you’d take the stem off a pumpkin before carving a jack-o-lantern), and fill them with a little scoop of ice cream before replacing the tops. If you want to go a step further, you can add a bit of melted chocolate to seal up the top, or simply dust with powdered sugar.

Although the French soccer team disgraced themselves on the world stage, at least we can thank that country’s chefs for their tasty contribution to the culinary world!
Now that the World Cup is upon us, we’ve been forced to remind each other that we should pull ourselves away from the TV for long enough to enjoy a little bit of the Seattle sun as it starts emerging from a long winter of hibernation. And what better way to enjoy summer (while still embracing the international spirit) than by making Profiteroles; light, puffy pastry balls filled with ice cream.
We were inspired, once again, by the Michael Ruhlman book Ratio, which provided us with the basic steps necessary to make the dough known as pate a choux (pronounced “pat a shoe”). Once we’d made the shells (as described below), we tried our hands at another batch of homemade ice cream; this time, a delicious chocolate orange, reminiscent of those Terry’s chocolate oranges (recipe not included here, but maybe we’ll do a dedicated ice cream post later in the summer). Although neither of us are big chocolate ice cream fans, we found that the orangeiness perked the flavor right up, and it proved to be the perfect filling for our profiteroles.
PATE A CHOUX (for use in profiteroles, cream puffs, éclairs, gougeres, or even gnocci).
Ingredients
- 1 Stick Butter
- 1 Cup Water
- 1 Cup Flour
- 4 Large Eggs
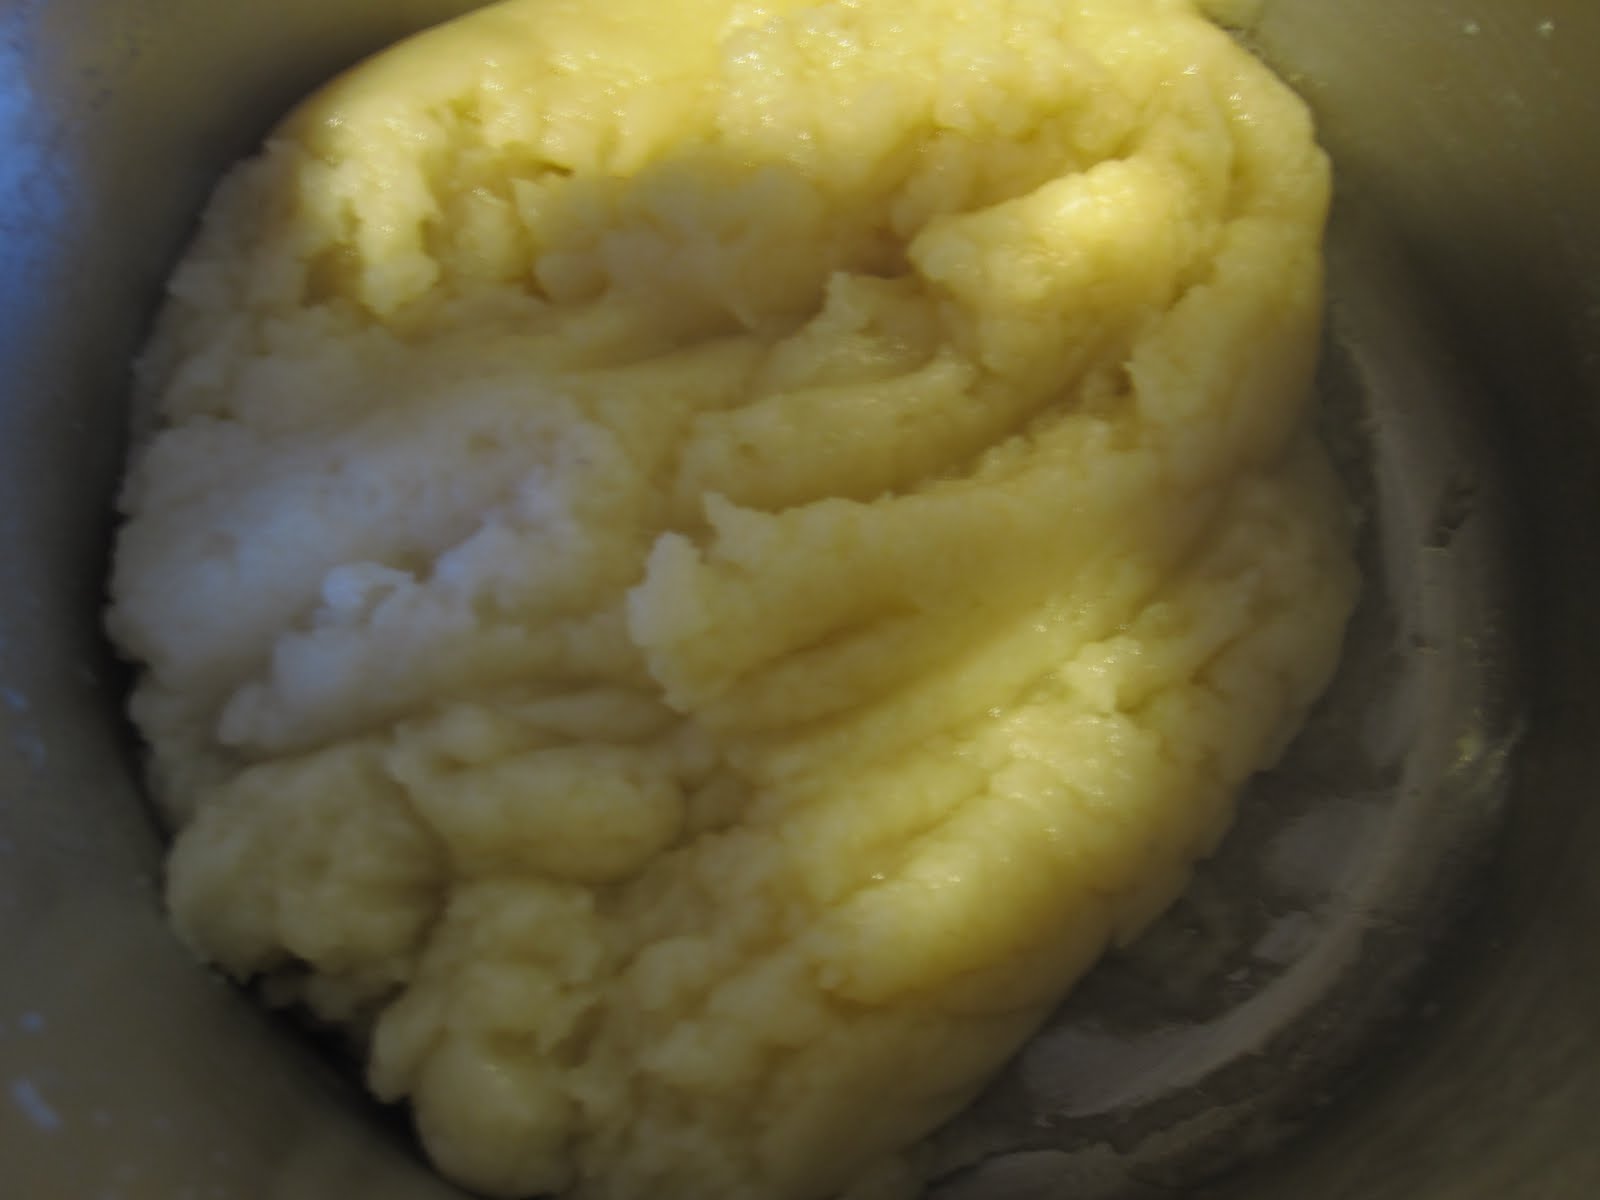
- Put the butter and water into a saucepan over medium heat and wait until the butter melts completely.
- Slowly pour in the flour, mixing with a wooden spoon until it absorbs all of the water.
- Continue to stir for 1-2 minutes, or until the mixture starts pulling off the sides of the pan.
- Let the mix cool down for a minute or two (but not much longer than that), then dump into a KitchenAid mixer with the paddle attachment (this can also be done by hand).
- Turn the mixer onto low, and add the first egg, waiting for it to become fully incorporated. When you first add the egg, the entire mixture becomes shiny and slippery, but after a minute or so, becomes more flat and rough. It's at this flat and rough stage that you know that the egg has been incorporated.
- Add the remaining three eggs, waiting between each for the previous egg to become incorporated.
- Heat an oven to 425, then pipe the mixture onto a non-stick baking sheet (or use parchment paper).
- Bake the puffs for 10-15 minutes (until they start to look a little brown), then lower the oven to 350 and cook for another 20 minutes (or so). The first shot below is at 10 minutes, the next is at 15 (when I turned the oven down), and the final is at 30.
- Once you think they're done, pull one out and try it. If it still tastes a little eggy, leave them in for a bit longer.
- Pull them from the oven and put them onto a cooling rack.


Friday, May 14, 2010
Where's the (Ground) Beef?
No, seriously, where's the beef? After dreaming all day about perfectly-cooked, juicy, medium-rare burger, Allie and I were horrified to discover that the fattiest ground beef that we could find at our local grocery was 93/7 (compared to our preferred burger mixture of 80% lean, 20% fat, which, in our minds, yields the juiciest, most tender patties). After talking to the butcher and confirming that there was nothing close to what we were after, we did the only thing that would enable us to enjoy the burgers that we'd been lusting after all day: we bought a rib eye and decided we'd grind it ourselves.
HOUSE-GROUND RIB EYE BURGERS
Ingredients

HOUSE-GROUND RIB EYE BURGERS
Ingredients
- Rib eye Steak (~1/2 pound per person)
- 1 T Butter (Melted)
- Salt
- Pepper
- Buns
- These directions actually start at the store itself. When buying your steak, you should look for a few things: Great marbling (ensuring that there is a good amount of white fat flecks in the muscle itself), a rich pink color, and a non-mushy texture. You can buy bone-in or boneless (but if you buy the former, you'll need to cut the bone out yourself).
- After getting home with your steak, cut it into long slices, sprinkle liberally with salt and freshly-ground pepper, and put it into the freezer for about 10 minutes. This will firm the meat up enough so that it can be easily ground.
- After the meat is nice and firm, it's grinding time! We used our meat grinder attachment for our trusty Kitchen-Aid stand mixer, and used the larger of the two dye plates. After grinding the chunks of meat once, we put the once-ground beef through the grinder again, which further mixed the fattier bits with the leaner bits.
- After grinding all of the meat, we formed it into patties by starting with balls and gently flattening them out. We also made sure to leave an indention in the middle of each patty, so as the meat expands as it cooks, the burger doesn't get too round. After the grill was preheated, we melted the butter in the microwave, brushed one side of the burgers, and put them, butter side down, onto the hot side of the grill.
- After about three minutes, we quickly buttered the uncooked tops of the burgers, and flipped them. Note: Thou shall NOT push the burgers down with the spatula (lest you lose the delicious juices. Be prepared to combat any flare-ups with a squirt-bottle of water.
- After another three minutes or so, we pulled the burgers (internal temperature around 115). We then let them rest for between five to ten minutes so that the juices could re-introduce themselves into the meat (and not go running as soon as we bit in).
- After the burgers had rested, we put them onto the toasted buns, and kept toppings to a minimum (balsamic-caramelized onions and mayo). We cut in, and enjoyed.


All in all, we were frustrated by a cruddy meat selection at first, but necessity is the mother of amazing burgers. The lack of decent ground chuck led us to improvise with rib eye, which we will absolutely be repeating in the future.
Sunday, May 9, 2010
Seattle Restaurant Week: Six Days in Heaven
It was late March when Allie and I heard about Seattle Restaurant Week, a 9-day event in which over 100 restaurants in Seattle would offer a 3-course prix fixe meal for $25. Allie and I immediately started planning how we would take advantage of some great food for an even better price. We looked at the menus for the stand-out restaurants on the list (both places we’d been and placed we’d been dying to try), and both rated each of them from 1 to 10, splitting the difference when our scores differed. After reading through more than 30 menus, we ranked them, picked our top six, and immediately made reservations.
We knew that this was one of the best ways that we could sample some of the pricier places that Seattle has to offer, and that we would eat like kings for a week. On the other hand, we spent the rest of the month eating leftovers to ensure that our wallets would be able to compensate for Restaurant Week. (Six restaurants at $50 a pop without tax, tip or beverage(s) can still add up, you know!)
Here’s a recap of the amazing restaurants we visited, and our favorite dishes we had at each of them. (And yes, we were the dorks taking pictures of everything that was put down in front of us. But, sometimes being a dork pays off…)
Crush (2319 East Madison Street)


 Perfect vanilla pudding with root beer Madeline’s and toffee crumble
Joule (1913 North 45th Street)


We knew that this was one of the best ways that we could sample some of the pricier places that Seattle has to offer, and that we would eat like kings for a week. On the other hand, we spent the rest of the month eating leftovers to ensure that our wallets would be able to compensate for Restaurant Week. (Six restaurants at $50 a pop without tax, tip or beverage(s) can still add up, you know!)
Here’s a recap of the amazing restaurants we visited, and our favorite dishes we had at each of them. (And yes, we were the dorks taking pictures of everything that was put down in front of us. But, sometimes being a dork pays off…)
Crush (2319 East Madison Street)
Grilled pork belly served atop stone-ground grits*
Palisade (2601 West Marina Place)

Wagyu Sirloin with fingerling potatoes and grilled asparagus (this was seriously melt-in –your-mouth incredible)
Spring Hill (4437 California Avenue Southwest)

Joule (1913 North 45th Street)
Korean-influenced Alaskan black cod*
Nell’s (6804 East Greenlake Way North)
Pork Tenderloin with cauliflower and pea tendrils
Dahlia Lounge (2001 4th Avenue)
Made-to-order doughnuts with rhubarb jam and vanilla mascarpone cream. Yes, they live up to the hype.
Dahlia coconut cream pie with white chocolate and toasted coconut.
*These photos were two of the three winners of the Seattle Restaurant Week photo contest. Yep… we’re award-winning photographers! Plus, we ended up winning gift certificates to two of the restaurants that barely missed the cut when we decided when we’d go during Restaurant Week itself! Plus the budgeting continues, so we’ll take all the help we can get in supporting our dining habit.
Sunday, April 25, 2010
The Flavor Bible: More Delicious than the Actual Bible!
Imagine this: you have a fridge and pantry full of food, a garden full of herbs, a rumbling stomach, and no idea what to make for dinner. You rummage through your potential ingredients, racking your brain for something to cook, but inspiration doesn't strike. Enter The Flavor Bible. A quick flip through the book, and with some basic cooking techniques, a beautiful, harmonious dinner is just a few minutes away.
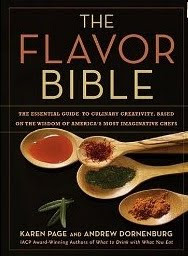
Unlike most cook books, The Flavor Bible doesn't actually include any recipes. Rather, it consists of an alphabetized list of ingredients, followed by other ingredients that match well with the main ingredient. The lists are based on feedback from hundreds of professional chefs, and the resulting answers are displayed based on the number of people who voiced the same opinion.
For example, if you look up hazelnuts, you'll find that CHOCOLATE and VANILLA are the most-referenced good pairings (as indicated by the uppercase letters). Less-popular but also mentioned favorites include items like coffee, figs, and honey (as indicated by the bold letters). The rest of the list is made up of ingredients that fewer people mentioned, like kiwi, cinnamon, and beets. But heck, looking over the options, you might just toss together a beet salad with toasted hazelnuts and a honey-cinnamon vinaigrette. Yes, please!
Although some pairings are quite obvious (who needs a book to know that Lobster and Butter taste good together?), many of them are more surprising, and we can almost always find some of the recommended ingredients around our house. For instance, halibut and rosemary? We wouldn't have thought of it, but it was delicious (pan-seared the fish and used rosemary to scent it while the fish cooked).
Additionally, the book lists several ingredients that go well together in the 'Flavor Affinities' lists. For instance, if you look up pineapple, you'll see things like "pineapple + avocado + watercress" or "pineapple + rum + vanilla + walnuts."
The last aspect that we love is that for a handful of ingredients, they actually quote chefs or list restaurant dishes from some of our favorite culinary geniuses. Everybody from Thierry Rautureau (chef/owner of Rover's in Seattle, and recent Top Chef Masters competitor) to Charlie Trotter to Hubert Keller to Eric Ripert weigh in on dishes that they serve, or share other interesting tidbits about various ingredients that they love.
The thing that we like most about the book is that it provides inspiration for dishes, rather than recipes. It still enables the cook to be the creative force in the kitchen, but it provides them with some direction or suggestions for them to use. In our house, it's become a go-to every time we have some basic ingredients and are looking to add some pizazz or otherwise push a dish over the top. The biggest testament we can give this book is that we've given it as a gift to folks we know and love on more than one occasion, who have in turn bought it as a gift for their friends, on more than one occasion. Highly recommended, especially if you just want some general direction for a dish or ingredient as opposed to a step-by-step instruction manual.
Wednesday, April 14, 2010
P.T.I.Y.F. Holiday Edition: Easter
As far as the major food holidays go, Easter doesn’t usually come to mind the way others do (looking at you Thanksgiving!). We think it’s high time Easter was moved up in the ranks. This time of year many fresh fruits and veggies are just coming into season, and they fit in really well with traditional Easter themes of spring and rebirth. Plus, we’re always looking for an excuse to make a giant ham and gorge ourselves on chocolate eggs. This Easter, we had our friend and partner in crime, John, over for a low-key dinner. True to form, made way too much food for three people. Oh well, more ham for everyone!
Deviled Eggs with Crispy Bacon

Deviled eggs have always been a go-to appetizer for us, and a great way to get rid of the pastel boiled eggs that were hidden all over the yard. Allie has been hooked since she was little, as the creamy, tangy treats often made appearances at her parents’ parties. What, you ask, could make deviled eggs even better? The same thing that makes everything better! Bacon! Kudos are due to Uncle Steve, we absolutely stole the idea of adding crispy crumbled bacon to these little devils from him. He brought the same thing to last year’s Patriots tailgate. It adds a great crunch to contrast with the silky filling. Highly recommended.
Ham, Beautiful Ham

A good quality ham is clutch to any Easter feast…er. (Sorry, had to do it.) Sub-par ham with way too much fat, soaked in salt water, with a pouch of neon mystery glaze just won’t cut it. In our opinion you just can’t beat a Honey Baked Ham. However, we don’t have $90 to blow on any part of a pig (Editor’s note: those are Allie’s words. Ben could be convinced), so we went with a simple and delicious Hempler’s at a much more reasonable $30. No fancy cooking tricks here, we just baked it and served it sliced with a choice of Dijon or brown mustard for dipping.
Fresh Peas with Mint Compound Butter

We saw English peas in their pods at our local market, and had to try them. We hadn’t really seen peas in non-box or can form before, and it turns out the minimal effort of shelling fresh peas is really worth it, with a sweet grassy note that you don’t find elsewhere. Ben mixed up mint from our herb garden with softened butter in the food processor, and we used that to quickly sauté the fresh peas.
Pommes Anna

We had asked John to bring a starchy side dish, knowing he could be fully trusted not to show up with a box of instant mashed potatoes. He went above and beyond anyone’s reasonable expectations, and made pommes anna, a masterpiece of wafer thin potato slices, drenched in clarified butter, seasoned lightly with salt and pepper, and layered into a skillet. While baking, the potatoes crisp on the top and bottom layers, leaving the middle soft and delicate. When they were done, John flipped the contents out of the skillet onto the plate, revealing a lovely potato tart. Of course by the time we were done with it, it looked like it had been ravaged by wolves, but it sure was pretty while it lasted.
Homemade Crusty Bread

Our entire last blog post was about this exact recipe, so we won’t re-hash it in any detail here. The bread was still easy, still tasty, and still made the house smell awesome.
Strawberry Rhubarb Crumble with Strawberry Basil Ice Cream

Normally, we don’t consider desserts our strong point, so we were very happy and slightly surprised that we pulled this off. The crumble (recipe below, off of the Smitten Kitchen blog) had the classic sweet/tart combination of a strawberry rhubarb filling and a topping that was somehow soft and crunchy at the same time. The lemon zest in the topping gives it so much flavor, it was tempting to eat it alone. We topped the crumble with a homemade Strawberry Basil ice cream (which we whipped up with our ice cream attachment for the Kitchen Aid mixed), and it added a nice earthy creaminess to the tart filling. Honestly, though, any ice cream would be great.
STRAWBERRY RHUBARB CRUMBLE
Yields 6 to 8 servings.
Ingredients
For the topping:
Deviled Eggs with Crispy Bacon
Ham, Beautiful Ham
Fresh Peas with Mint Compound Butter
Pommes Anna
Homemade Crusty Bread
Strawberry Rhubarb Crumble with Strawberry Basil Ice Cream
STRAWBERRY RHUBARB CRUMBLE
Yields 6 to 8 servings.
Ingredients
For the topping:
- 1 1/3 cup flour
- 1 teaspoon baking powder
- 3 tablespoons sugar
- 3 tablespoons Demerara sugar (or turbinado sugar aka Sugar in the Raw)
- We used granulated sugar here as well and it turned out fine
- Zest of one lemon
- 1/4 pound (1 stick or 4 ounces) unsalted butter, melted
- 1 1/2 cups rhubarb, chopped into 1-inch pieces
- 1 quart strawberries plus a few extras, hulled, quartered
- Juice of one lemon
- 1/2 cup sugar
- 3 to 4 tablespoons cornstarch
- Pinch of salt
- Heat oven to 375°F. Prepare topping: In a mixing bowl, combine flour, baking powder, sugars and lemon zest and add the melted butter. Mix until small and large clumps form. Refrigerate until needed.
- Prepare filling: Toss rhubarb, strawberries, lemon juice, sugar, cornstarch and a pinch of salt in a 9-inch deep-dish pie plate. (I used an oval dish this time, because they fit better in the bottom of a shopping bag.)
- Remove topping from refrigerator and cover fruit thickly and evenly with topping. Place pie plate on a (foil-lined, if you really want to think ahead) baking sheet, and bake until crumble topping is golden brown in places and fruit is bubbling beneath, about 40 to 50 minutes.
Friday, April 2, 2010
Pssst... Knead some Dough?

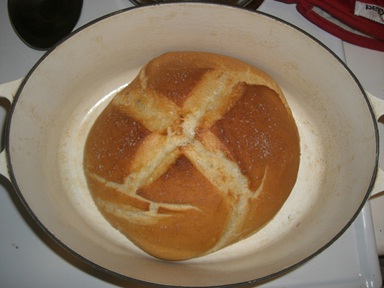
Ever since were discovered the ease and deliciousness of making homemade bread, we both agree that it’s one of the greatest things since, well, sliced bread. In fact, after being initially inspired by Michael Ruhlman’s recipe in Ratio (which he admits he stole from the NYT), we’ve made a loaf every week or so. The beauty of the recipe is that it’s simple (only requires minimal hands-on work), cheap (about a buck and a half for the ingredients), adaptable (you can throw anything into the dough that you want), and it fills the house with that amazing fresh bread smell.
HOMEMADE DUTCH OVEN BOULE
Ingredients
- 20 ounces flour
- 12 ounces water (warm)
- 2 t kosher salt
- 1 t yeast (either instant or active dry, but the latter will need to be activated)
- Olive Oil
- Sea Salt (or more kosher salt)

Directions
- Weigh out the flour directly into your mixing bowl (ideally into a KitchenAid bowl).
- Add the salt, then gently pour the water on top, so as not to combine the flour and water too much.
- Sprinkle the yeast on top of the water, and allow it to activate for around 10 minutes.
- Once the yeast is activated (and smells nice and bread-like), use the KitchenAid dough hook and knead the dough on the lowest setting for 10-15 minutes. We’ve found that with the 20 ounces of flour, the dough tends to be too sticky and will get stuck on the dough hook, so we typically keep adding flour (slowly, about a teaspoon at a time) until the mixer kneads it consistently. You know that you’ve kneaded the dough enough when you can roll up a small ball then gently stretch it into a transparent layer without it tearing.
- After kneading, cover the bowl with plastic wrap and let it rest in a warm place for an hour. During that time, it will rise to about twice its original volume.
- After the initial rise, knead the dough for a few minutes on a floured surface, and then cover with a dish towel for a short (15 minute) secondary rise.
- Pre-heat the oven to 450 to ensure that it’s plenty hot when it’s time to actually cook the bread.
- After the secondary rise, spread some olive oil into the bottom of a Dutch oven (tee hee), then put the dough in to proof (fancy word for “sit”) for an hour.
- After the dough has proofed, spread on a small amount of olive oil and sea salt, then cut an ‘X’ into the top.
- Cover the Dutch oven with the lid and put into the oven (we’ve had the best luck putting it into the highest rack possible… otherwise the bottom can burn a little) for 30 minutes.
- After 30 minutes, remove the lid and return to the oven for another 10-20 minutes, or until the internal temperature of the bread reaches 200 to 210 degrees.
- Let the bread cool, and then enjoy it! Feel free to have fun with making savory breads (adding different fresh herbs , chopped olives, and/or roasted garlic) or with sweet breads (adding fruit and seeds or nuts).


Subscribe to:
Posts (Atom)

