
Ever since were discovered the ease and deliciousness of making homemade bread, we both agree that it’s one of the greatest things since, well, sliced bread. In fact, after being initially inspired by Michael Ruhlman’s recipe in Ratio (which he admits he stole from the NYT), we’ve made a loaf every week or so. The beauty of the recipe is that it’s simple (only requires minimal hands-on work), cheap (about a buck and a half for the ingredients), adaptable (you can throw anything into the dough that you want), and it fills the house with that amazing fresh bread smell.
HOMEMADE DUTCH OVEN BOULE
Ingredients
- 20 ounces flour
- 12 ounces water (warm)
- 2 t kosher salt
- 1 t yeast (either instant or active dry, but the latter will need to be activated)
- Olive Oil
- Sea Salt (or more kosher salt)

Directions
- Weigh out the flour directly into your mixing bowl (ideally into a KitchenAid bowl).
- Add the salt, then gently pour the water on top, so as not to combine the flour and water too much.
- Sprinkle the yeast on top of the water, and allow it to activate for around 10 minutes.
- Once the yeast is activated (and smells nice and bread-like), use the KitchenAid dough hook and knead the dough on the lowest setting for 10-15 minutes. We’ve found that with the 20 ounces of flour, the dough tends to be too sticky and will get stuck on the dough hook, so we typically keep adding flour (slowly, about a teaspoon at a time) until the mixer kneads it consistently. You know that you’ve kneaded the dough enough when you can roll up a small ball then gently stretch it into a transparent layer without it tearing.
- After kneading, cover the bowl with plastic wrap and let it rest in a warm place for an hour. During that time, it will rise to about twice its original volume.
- After the initial rise, knead the dough for a few minutes on a floured surface, and then cover with a dish towel for a short (15 minute) secondary rise.
- Pre-heat the oven to 450 to ensure that it’s plenty hot when it’s time to actually cook the bread.
- After the secondary rise, spread some olive oil into the bottom of a Dutch oven (tee hee), then put the dough in to proof (fancy word for “sit”) for an hour.
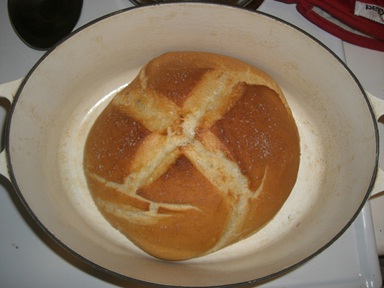
- After the dough has proofed, spread on a small amount of olive oil and sea salt, then cut an ‘X’ into the top.
- Cover the Dutch oven with the lid and put into the oven (we’ve had the best luck putting it into the highest rack possible… otherwise the bottom can burn a little) for 30 minutes.
- After 30 minutes, remove the lid and return to the oven for another 10-20 minutes, or until the internal temperature of the bread reaches 200 to 210 degrees.
- Let the bread cool, and then enjoy it! Feel free to have fun with making savory breads (adding different fresh herbs , chopped olives, and/or roasted garlic) or with sweet breads (adding fruit and seeds or nuts).


You probably do not even need the dutch oven for this - I have made similar loaves, and the bread has always just kept it's shape pretty well. I haven't tried this recipe, though. Also, I've been baking bread for some time, and I have never used a stand mixer! A little hand electric one also works very well!
ReplyDeleteLooks like a great recipe -can't wait to try it!